This Mulch is on Fire

Come on, sing along.

Earlier this week our apartment was on fire.

I was sitting in the office around 1 in the afternoon when I started smelling a wood fire. The windows were open and I assumed someone was grilling out. Then the smell got stronger and I realized it was a weekday. Who in their right mind grills out for lunch in the middle of the week. With this latter realization I began sniffing around the apartment. I am quite positive I looked ridiculous.

I went into the bedroom and there was nothing. I checked the mess of cords around the modem and nothing. For a moment I thought it was the Keurig, but nothing. Finally, I looked down the stairs and saw smoke. About that time I also heard voices.

I was quite certain I was overreacting. There was no way the apartment was on fire and there was a perfectly logical explanation. I went downstairs, the smoke getting stronger and opened the door. As it opened I saw the perky blonde apartment manager and in what I’m sure was a joking, disbelieving voice, I said “Is my house on fire?” In a matter of fact voice she promptly replied “Not anymore.” I heard the swish of a fire extinguisher and I looked around the door.

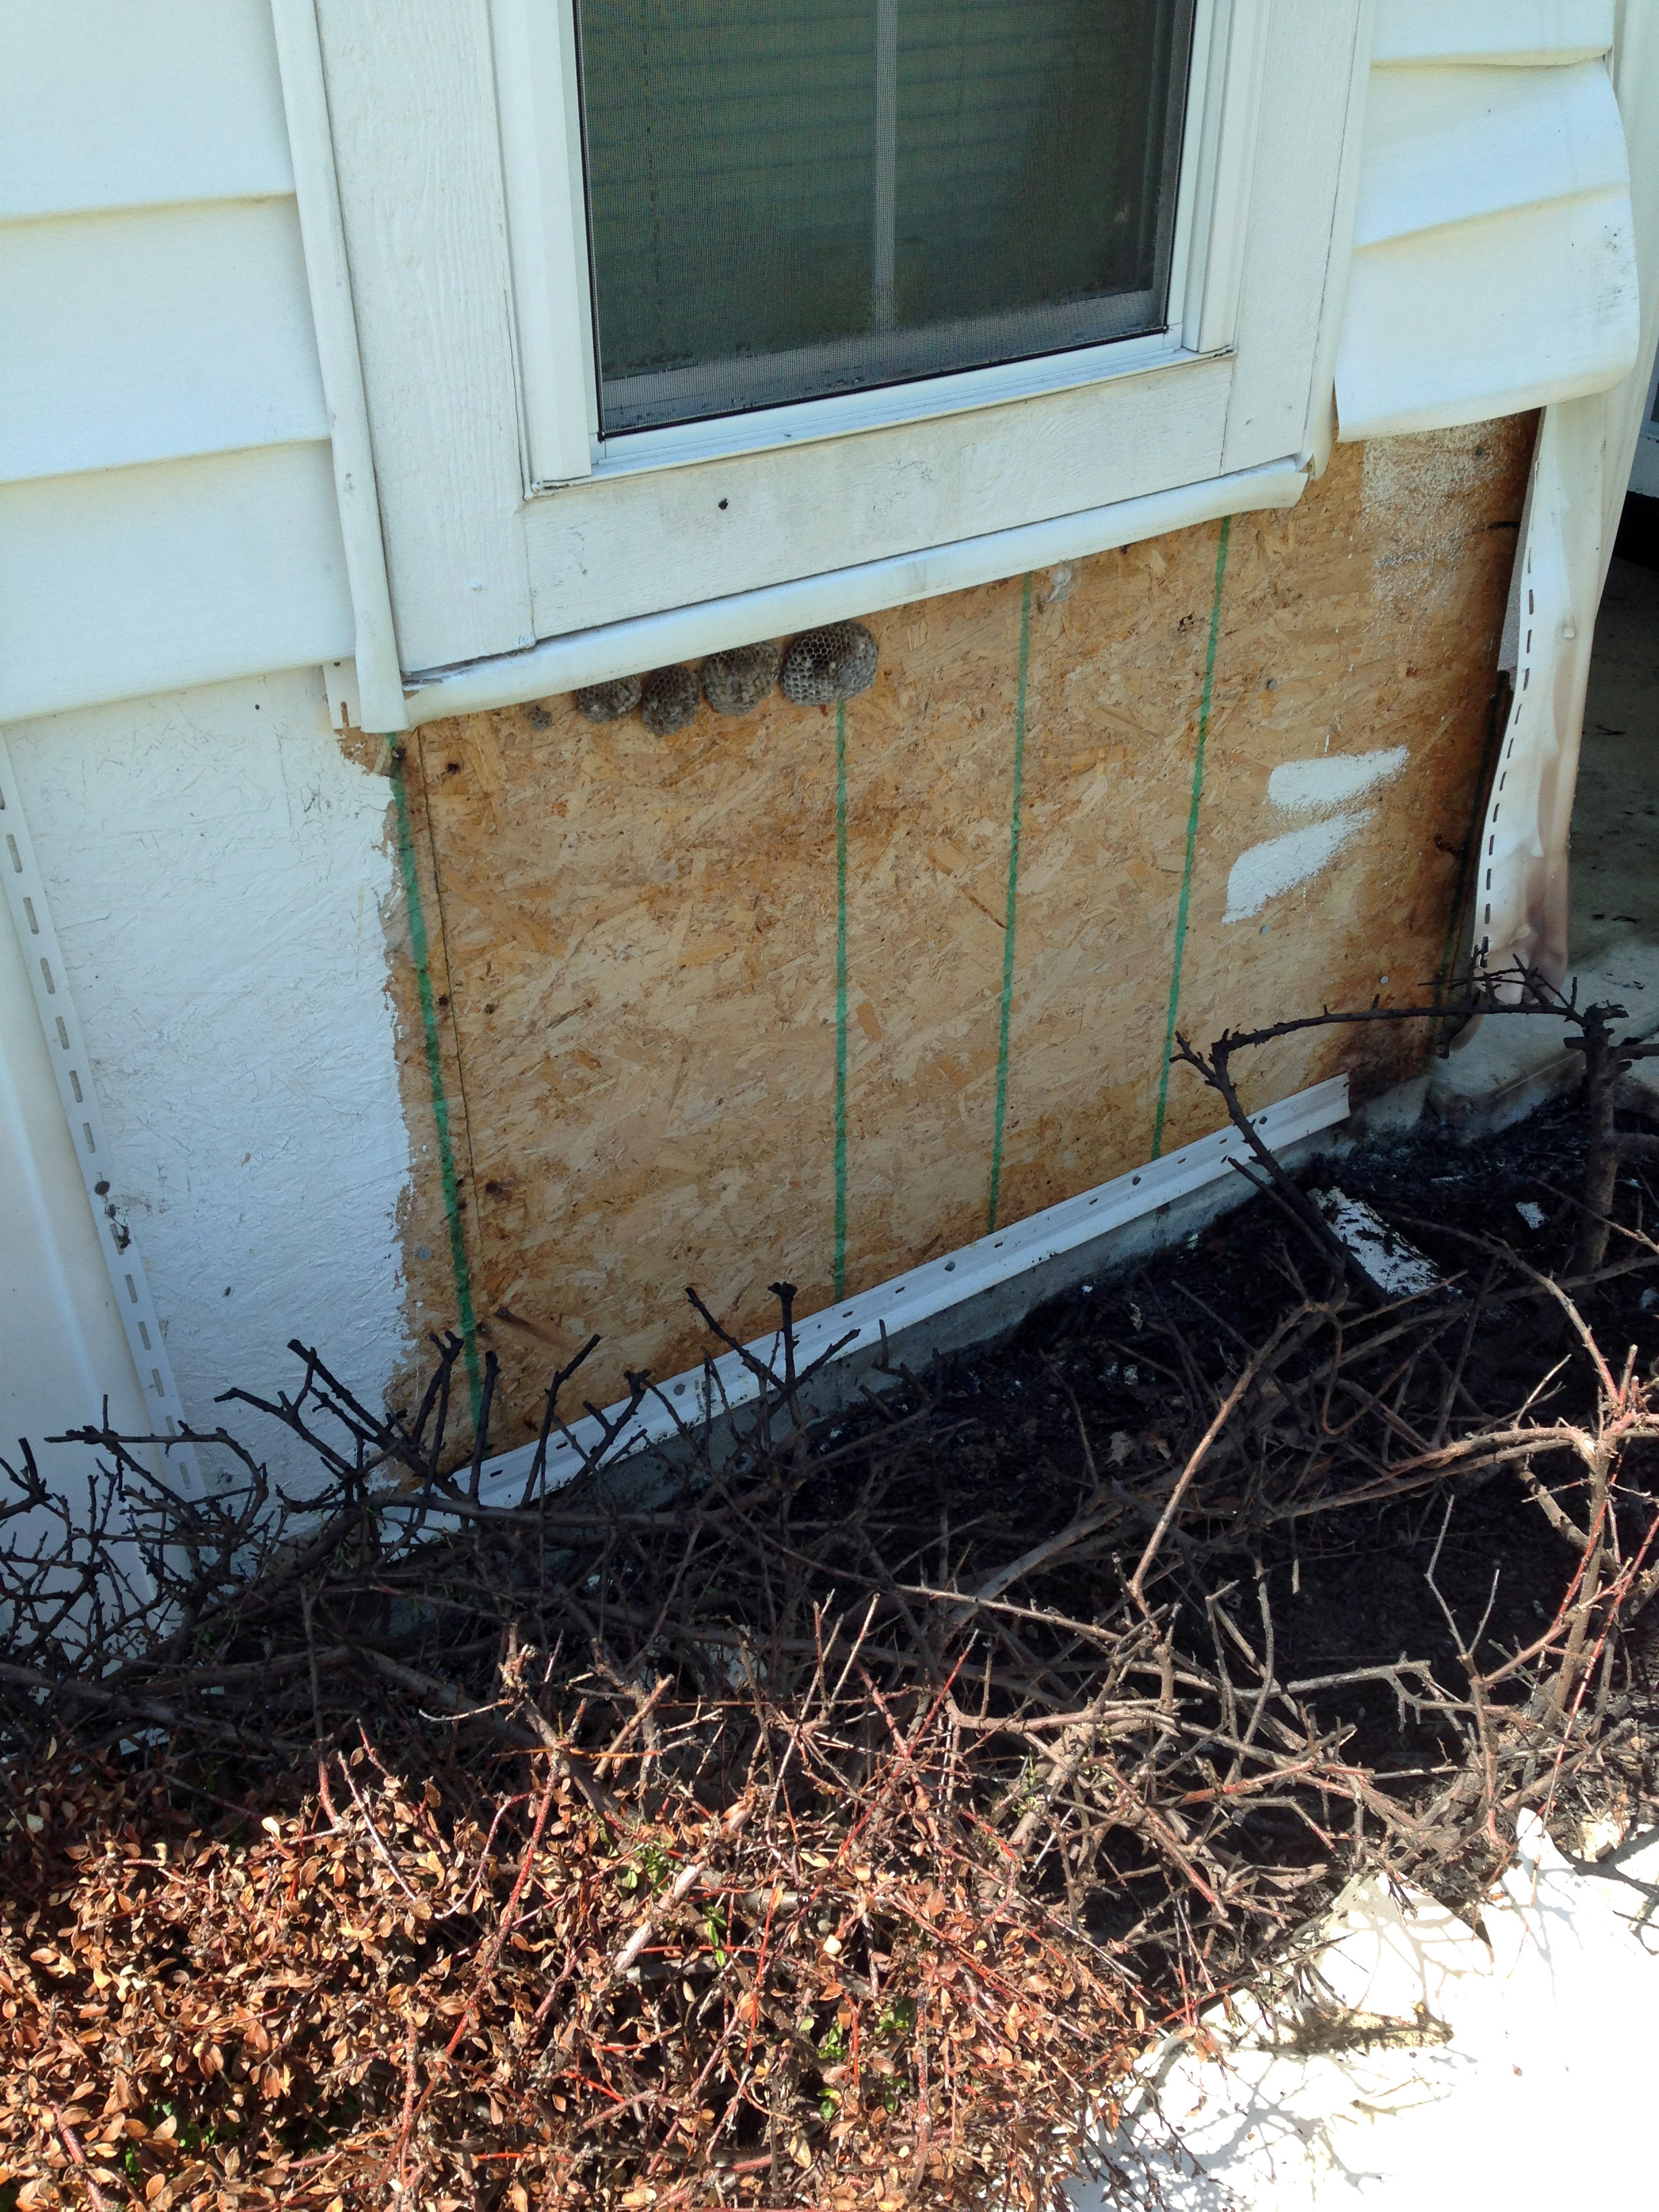
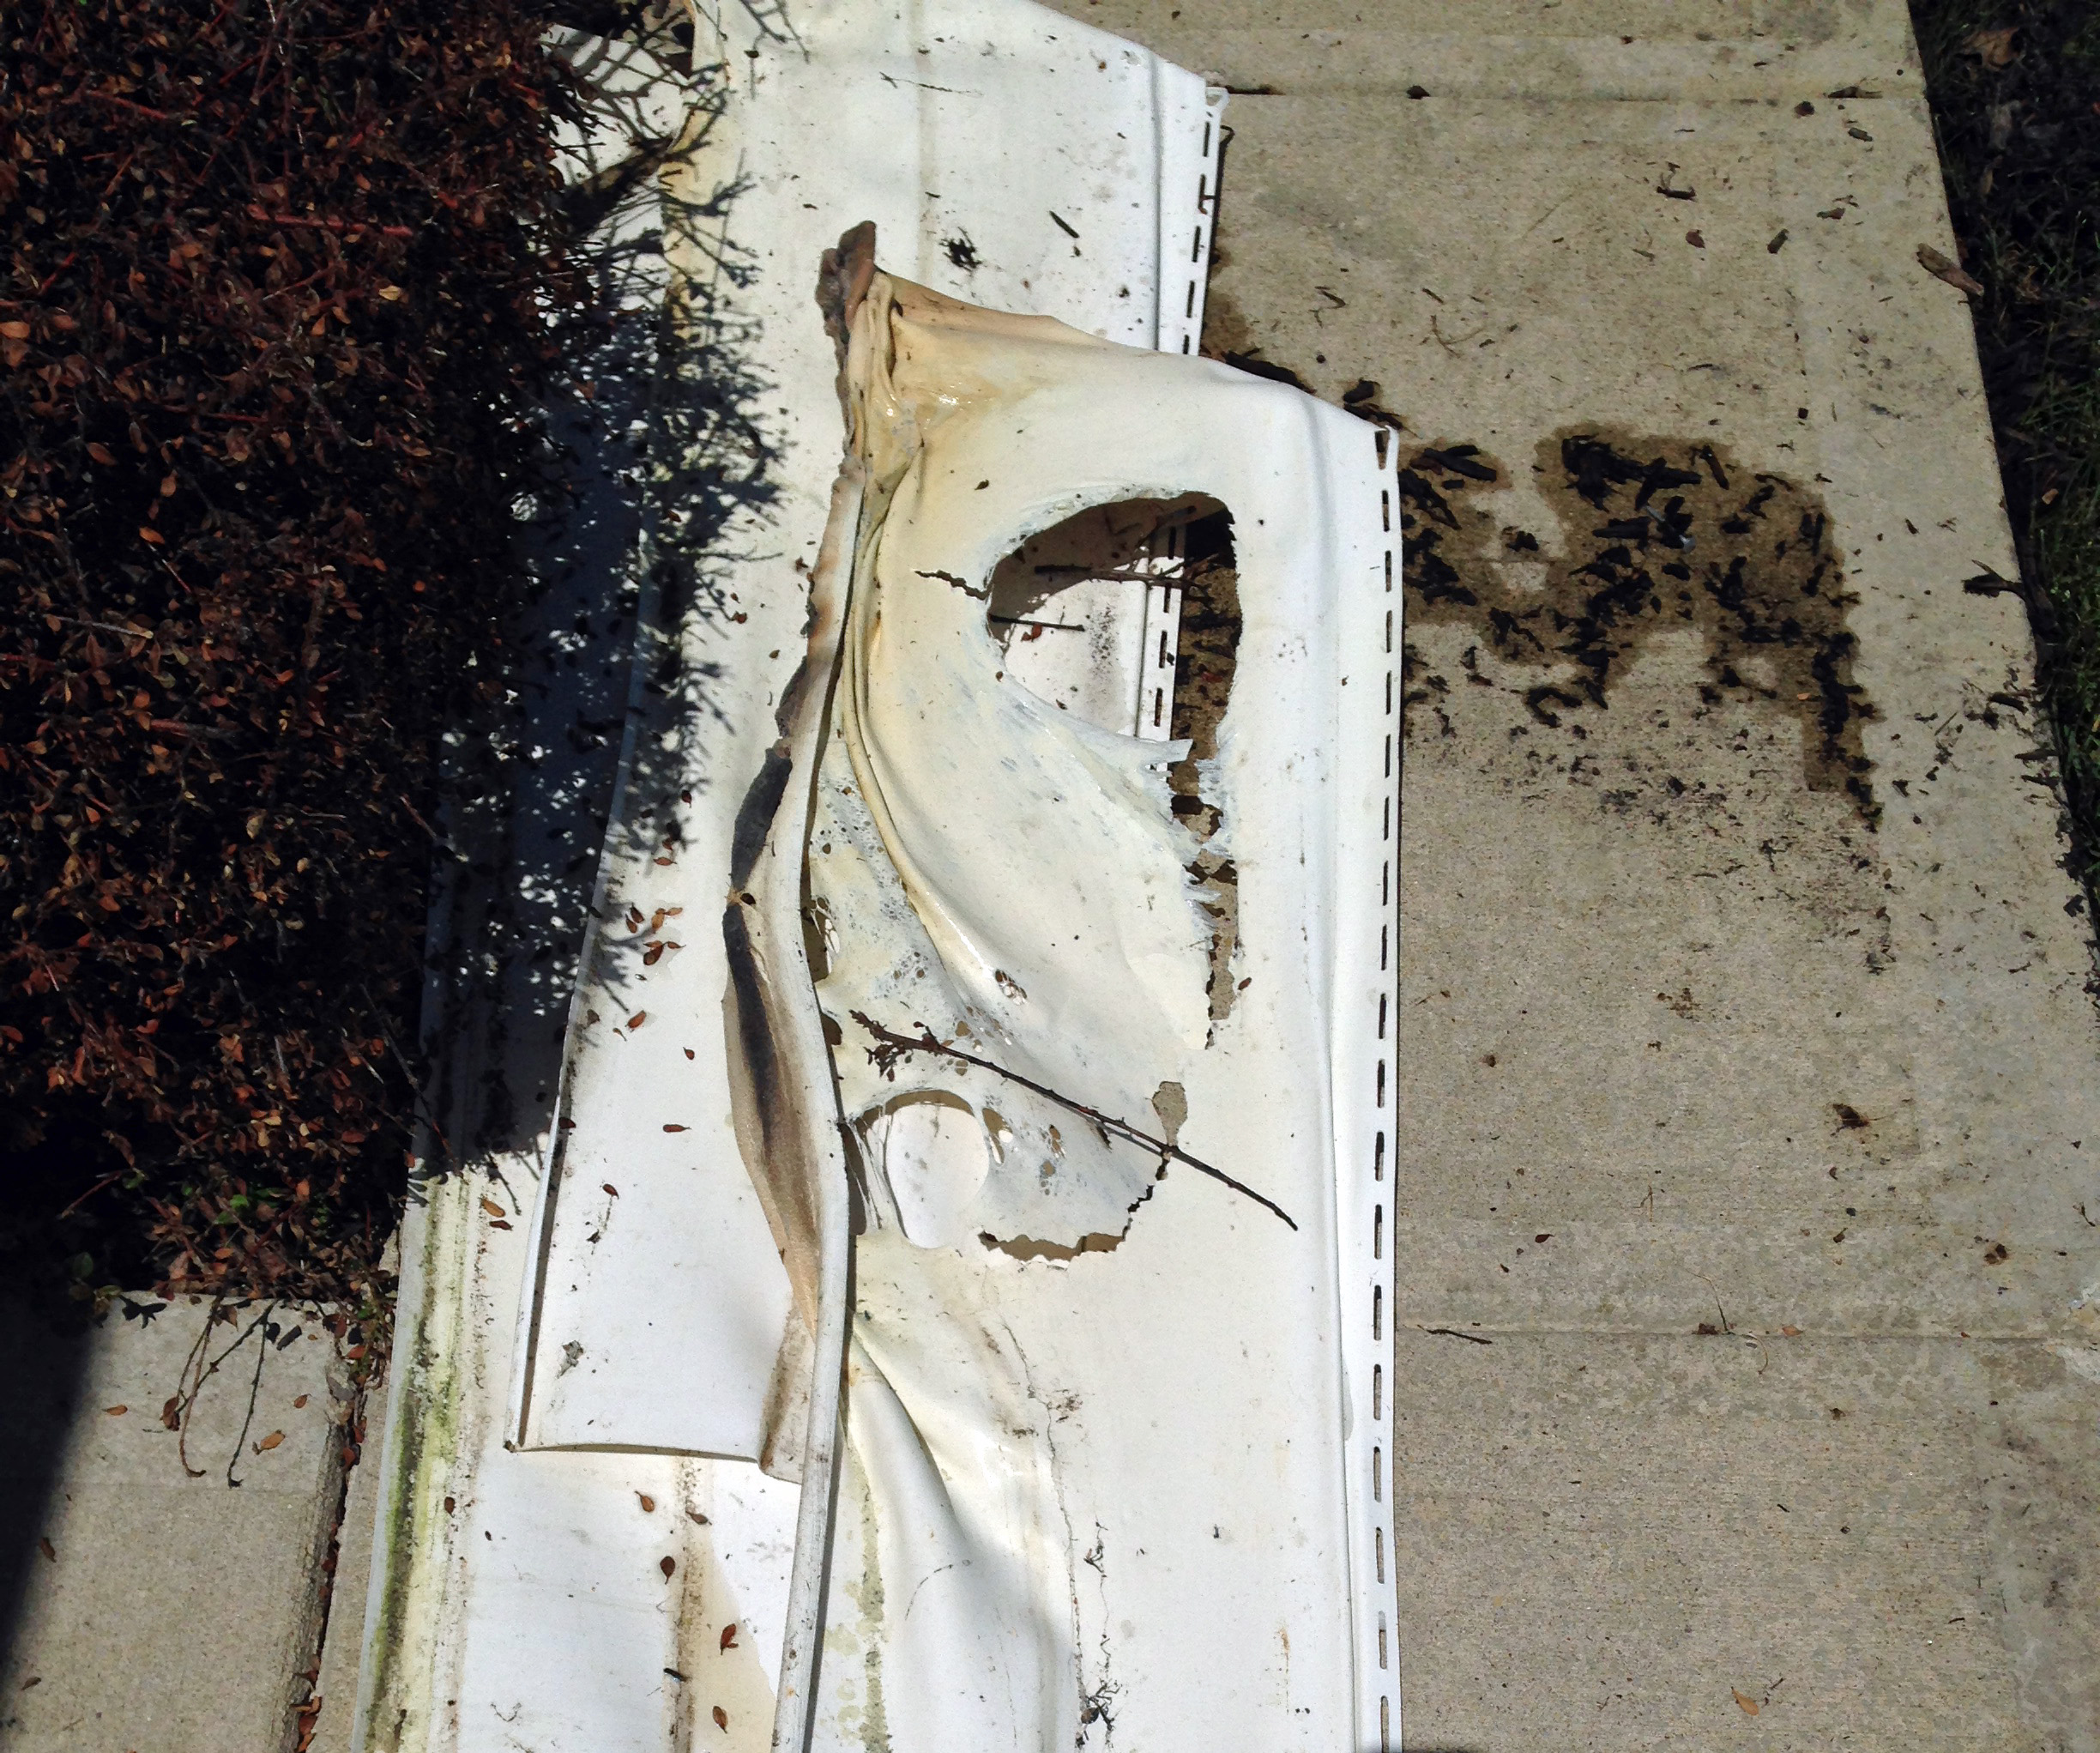
The shrub that used to sit there was nothing but branches and it was completely gone in some places. Everything looked like it was covered in grey ash. The siding had melted. The mulch was smoking. On a cool, Monday afternoon the mulch in front of our apartment had caught fire. Not only was it odd because it was such a cool day, but it was the second fire in the complex that day.

The fire department came out. There were some handsome fellows on that truck. Maybe it’s just the uniform.

There were several hot spots still in the mulch and the fire had spread to an adjacent bush.

Soon their hoses were out and everything was soaked. I saw the men walking around the complex looking for more mulch that was near the fire point. They didn’t find any. The firemen packed up their truck and left.

Meanwhile, I had opened every window in the house and turned on all the fans. What started as a nice smelling wood fire, became a nasty chemical smelling fire as the siding caught and melted.

All in all, it was a little more excitement than I had wanted on a Monday afternoon. As if Mondays weren’t rough enough.

And like any nosy renter, I took pictures of the whole thing.

IMG_4097

IMG_4098

IMG_4100

IMG_4099

The Wedding

As I create scrapbook pages from the wedding, I continue to go through the photos. Every time I see the smiles on our faces, I find myself automatically smiling and remembering that day. The power those photos seem to have amazes me every single time. I never expected that my wedding day would have such an impact.

Here are a few more wedding layouts. These are all from just before the ceremony.

Flowers Web

Justin Getting Ready web

Rubber Ducky Web

I’m starting to learn what type/style of scrapbooking I prefer. Creating layouts is starting to come a little easier to me. I still struggle with adding elements to the page. I love the layered and scattered look but I just can’t seem to master it yet.

3 Ingredient Peanut Butter Cookies

We heard a recipe for 3 ingredient peanut butter cookies on a podcast that we love. I was skeptical that the cookies would be good but Husband wanted me to give them a try anyway, so I did.

The recipe calls for:

1 cup peanut butter

1 cup sugar

1 egg

Mix together. I used my KitchenAid to mix the batter, but mixing by hand would be easy too.

Roll spoonfuls of batter into balls. I skipped this step and just used spoonful lumps. Worked just as well. Rolling into balls will make your cookies look more uniform.

Take a fork dipped in sugar and create hash marks across the top of the cookie. This is not a necessary step, but since the cookies do not spread or rise, you will need to flatten the cookie to some degree before baking. And since the cookie doesn’t spread, however big your cookies are when you put them into the oven, that is how big they will be when they come out the oven.

Bake at 350 for 12-15 minutes. I baked the first batch at 15 and the second at 12.

The recipe will yield between 12 & 24 cookies depending on the size of your balls. (I just giggled like a school girl. Hehe)

Let cool.

First thing I want to say is that this is probably the easiest recipe I have ever tried. If there are even easier recipes, I would love to hear them.

Second, this is not a “normal” peanut butter cookie. Without the rest of the ingredients in a regular peanut butter cookie, the texture is extra crispy and hard. Not a soft-batch cookie. But without the extra ingredients, the peanut butter flavor is much stronger. Also, I think the cookie is sweeter.

I recommend this recipe if you are short on time and need a fast dessert. I had these mixed, baked and cooled completely in about 50 minutes. More efficient cooks could probably have these ready faster.

If you want to be extra decadent, add chocolates to the cookies when they come right out of the oven. I used Hershey Miniatures, but Hershey Kisses or Dove Chocolates would also work. Whatever you like is what you should use. If you’re not careful when adding the chocolate, you can break the cookie. Even though it is crispy it is still a fragile cookie. I added chocolate to at least two cookies, breaking them in the process, before I realized I needed to be gentle.

Once I again I didn’t take photos of the process. One of these days I will remember. But here is a photo of the end result.

3 Ingredient Peanut Butter Cookies

There were more cookies, with more chocolates, but we ate those before I could snap the photo.

The Fruits of iNSD

Last Saturday was iNSD. It was also FCBD.

Acronyms. I hate acronyms.

iNSD is interNational Scrapbook Day. International Scrapbook Day is on May 4th and the US National Scrapbook Day is held the first Saturday of May. This usually creates an entire weekend dedicated to scrapbooking.

FCBD is Free Comic Book Day. It is also the first Saturday in May. Participating comic shops in the US and around the world give out free comic books.

That Saturday, I joined a scrapbook chat/live meeting at about 8 in morning.

A couple hours later were in line for FCBD, 15 minutes before our local shop opened. We were those geeks, eagerly waiting outside with fellow geeks. I picked my 5 free books, bought the newest Serenity and two expansion card packs for Firefly the Game and we were back home within the hour.

Mom was trying to change a light bulb on the outside of the garage. She had this nifty tool that let you change the bulb without even getting on a ladder. It would have worked but she accidentally moved the angle of the light in such a way that her nifty tool no longer worked. While Husband & mom tried to figure out what to do and while they went & bought a taller ladder, I rejoined the scrapbook chat.

Then Dave came over and we had a night of tabletop games. Tracy was sick and we really missed her. We played Firefly: Out to the Black, Cthulu Dice and my favorite, Zombie Dice.

After he left, you guessed it, I was back in chat. Some people had been there from 8am-11pm. I was not that dedicated.

During iNSD, I found a new community called “Get It Scrapped”. Members have access to “coaching” classes and dozens of ebooks, plus over 50 templates. I started using the coaching classes to try to make pages from scratch and to learn not to rely on templates. I’m finding it challenging but I’m learning quite a bit. I feel like I’m taking the training wheels off.

Throughout the day Saturday and Sunday I created 4 new layouts. And I stuck with the wedding theme. All of these were photos taken prior to the ceremony.

(I love the slightly suggestive journaling on this first page!)

Bridesmaids Jumping Web

Details Web

Getting Ready Web

Kisses

I can see some flaws in these pages, but rather than worry over them or even try to make changes, I’ve decided to leave the flaws. This is a learning process and I want to see my growth as a scrapbooker.

Lemon Blueberry Cupcakes

I used my new KitchenAid to really bake for the first time. Not some cake mix, but actually baking from scratch. No one shock in gasp. Oh, okay. Go ahead and gasp.

I went a little out of my comfort zone baking something that embodied two of my least favorite baked goods. First, they were cupcakes. Cupcakes are annoying. So messy and hard to eat. We do not get along that well. Secondly, they were lemon blueberry cupcakes. I LOVE lemons. But I’ve always had a sort of mental block when it came to sweet lemon desserts. Lemon cookies, lemon bars, lemon meringue pie we’re never for me. But Husband seems to really like lemon desserts & I know he loves cupcakes so I was willing to try something new.

I used this recipe:

http://www.foodnetwork.com/recipes/ree-drummond/missys-lemon-and-blueberry-cupcakes-recipe.html

Let me just say right now that I love my KitchenAid mixer. Without it, this fibro girl would not have been able to bake these cupcakes.

I liked that the batter ingredients were split into three bowls and then you mixed those contents together. First your butter & eggs, then milk & sugar and lastly the rest of the dry ingredients. My butter wasn’t entirely room temperature and I had trouble mixing it with the eggs. I think I might have even overbeat the eggs which caused for a stiffer batter.

You will also need to add some lemon zest. I needed 3 tablespoons. I bought two large lemons. I grossly underestimated. I might have had a tablespoon and a half, two tops. I added a dash of lemon juice to make up for the lack of lemon zest.

Before you pour the mixed batter into the cupcake liners, spray the cups with a cooking spray like PAM. OMGosh. This is especially important if you don’t want to spend $5 or more for those really good cupcake liners. I bought mine at Kroger. Cheap as possible. After the cupcakes have baked, the liners peel off without making a crumby mess and the cooking spray will help crisp up the outside of the cupcake and make it golden brown just like the cupcake tops. Absolutely brilliant trick. This might make me and cupcakes get along better.

Before you put the cupcakes in the oven to bake, place some blueberries tossed in flour on top of the batter. In theory, the batter will rise above the blueberries and they will sink throughout the cupcake. This was a FAIL for me. The batter never raised above the blueberries and I had to take a butter knife to sink them lower.

Also, the 18-20 minutes cooking time was a FAIL. Our oven stayed preheated/heated at the right temp through the whole process. My only guess is that the recipe was underestimated or more likely, our oven lies. If you have an external oven thermometer that would be best. If you’re like us and don’t bake often enough to justify another piece of clutter in the house, then you might want to be prepared for some extra baking time.

Once the cupcakes are finally baked, pull them out and let them cool on a rack. Don’t be lazy like I often am and just leave them in the pan to cool.

Next it’s time for the icing. Cream cheese icing is the best. Don’t let anyone tell you otherwise.

Seriously, how can anything with two sticks of cream cheese, a stick of butter and 3-4 cups of confectioner sugar be bad? (I know the answer to that but I don’t wanna hear it!

We also needed lemon zest for the icing. I just added a little extra lemon juice.

The KitchenAid made mixing this together so easy. Have I mentioned my love of the KitchenAid?

Finally, icing and decorate your cupcakes.

Despite my earlier caveats, these cupcakes are fanfreakingtastic and I highly recommend this recipe.

If I had been clever there would have been pictures of the process. But I’m not, so here is just the final product. (I do have a picture of Husband decorating with blueberries, but I am fair certain he would kill me if I shared that with you.)

Lemon Blueberry Cupcakes

Dave

When I wake up at early (doesn’t happen as often as it should) I like to take the time to digi (digital scrapbook).

This morning was no different.

I woke up at 6:15 and wanted to create a new page. I decided to make something that wasn’t part of a class. (Just to prove I could.)

I used a template from Fiddle Dee Dee and a kit from Digital Designs Essentials.

I stuck with the wedding theme and chose Dave as my subject. The cake photo is my favorite but I’m pleased with the layout as a whole.

Dave Web

Digital Scrapbooking… Again

Since I’ve been feeling better I’ve been returning to old hobbies that had fallen by the wayside.

Digital scrapbooking, as mentioned in one of my previous posts, is one of those hobbies.

Thankfully jessicasprague.com gives you unlimited to access to their classes after you have purchased them. In addition, the classes teach techniques in both Photoshop CS3 and Photoshop Elements. Having recently purchased Elements, I’ve been retaking the classes.

My subject of choice has been the wedding & honeymoon.

relaxing-mornings-web

Photo BoothWeb

Justin 5 Things Web

Cute Title Here Web

Jen Caputo - Digital Sketch

Bambi Web

My favorites by far are the photo booth layout & the Bambi layout. The others are pretty cool too.